Back in December we covered the various styles of bow tie, from batwing to butterfly.
Learning about the traditions and conventions helped me clarify which style I prefer for myself, and today I’ll be covering which one I had made, and why.
My guide through all this was Mickael Korausch, who makes some of the finest bespoke bows I’ve tried, under his brand La Bowtique.
Mickael was great at walking me through an area I know relatively little about, cutting and making the tie himself, and also giving me tips on tying the bloody thing - something I do even less than write about them.

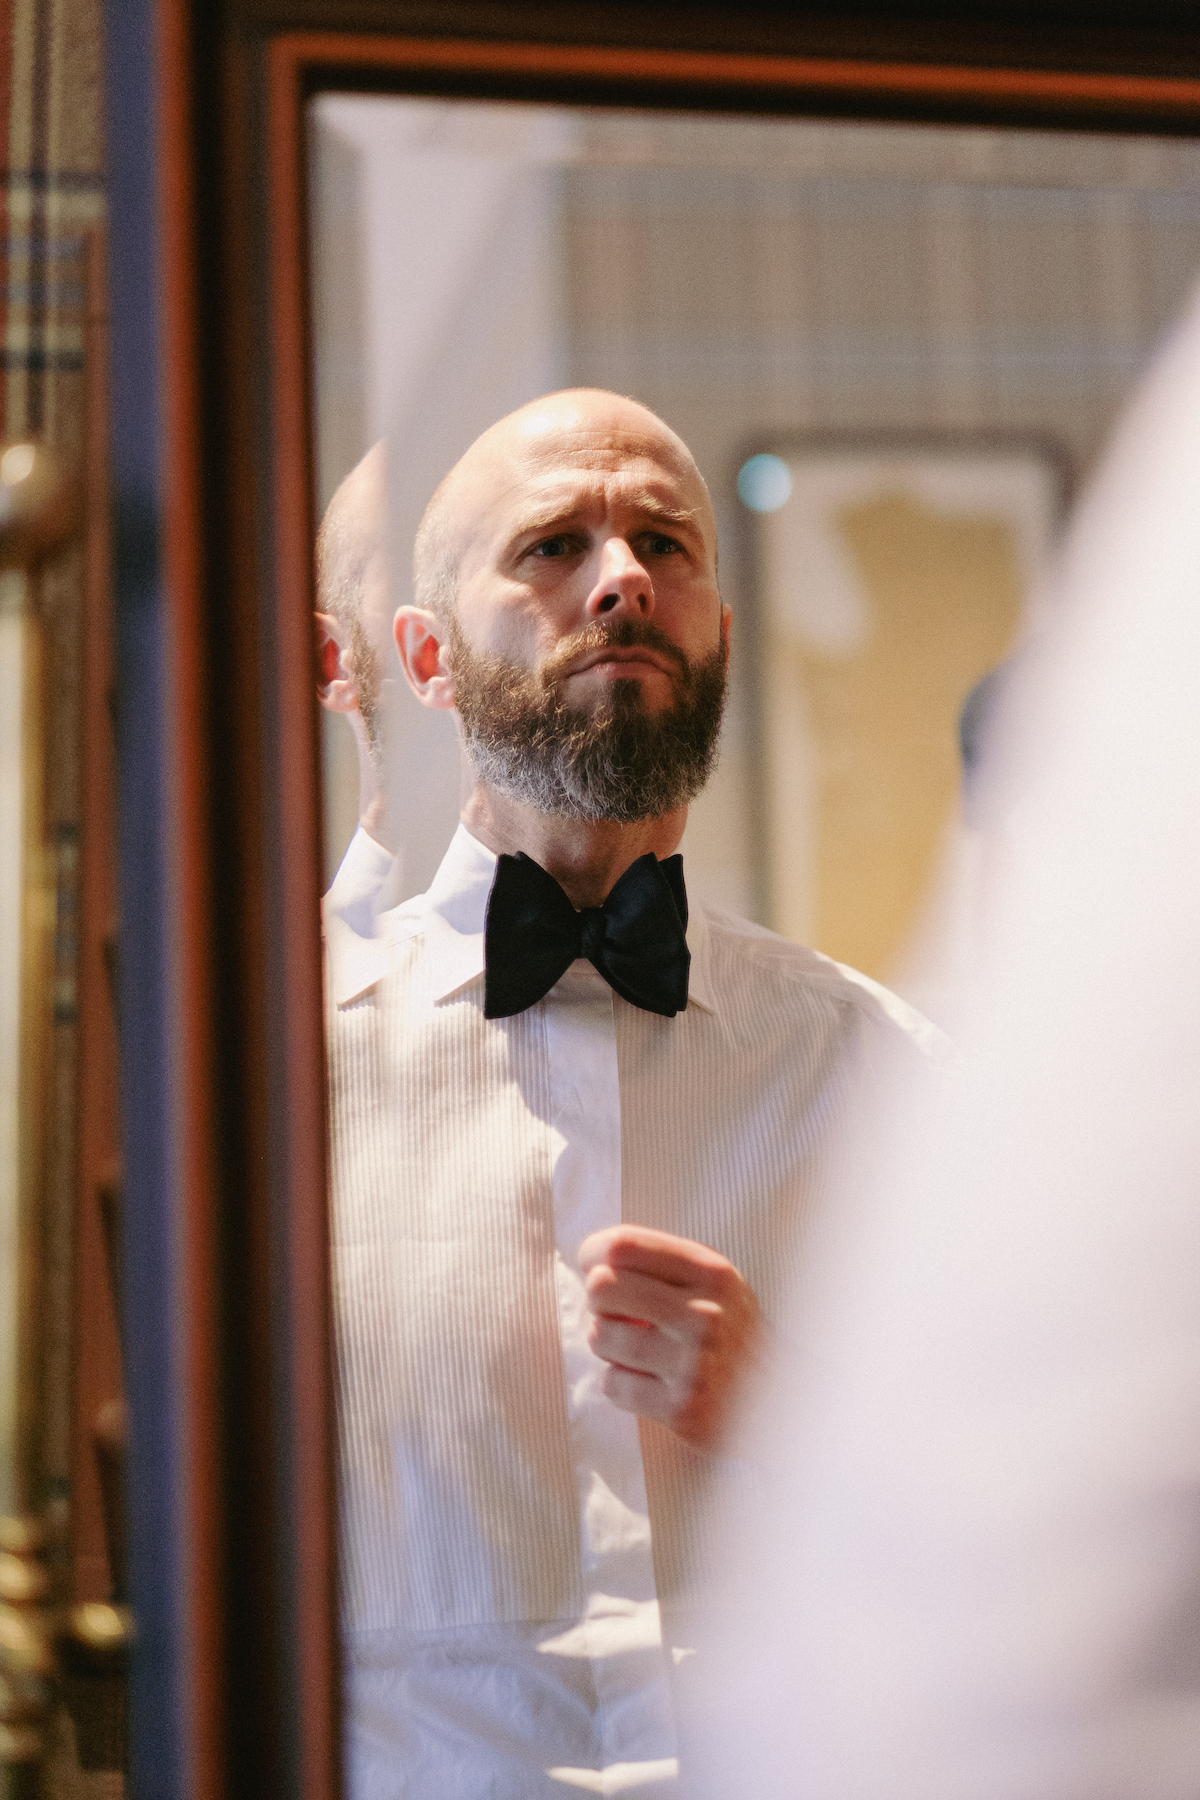
Deciding on the width of a bow tie is fairly straightforward. The guideline is for it to match the outside corners of your eyes, and you generally don’t want to vary much from that.
As we covered in the first article, having a bow that is much wider or much narrower is what makes some styles look silly, even comical. You can get away with a lot in the height of a bow, but less in the width.
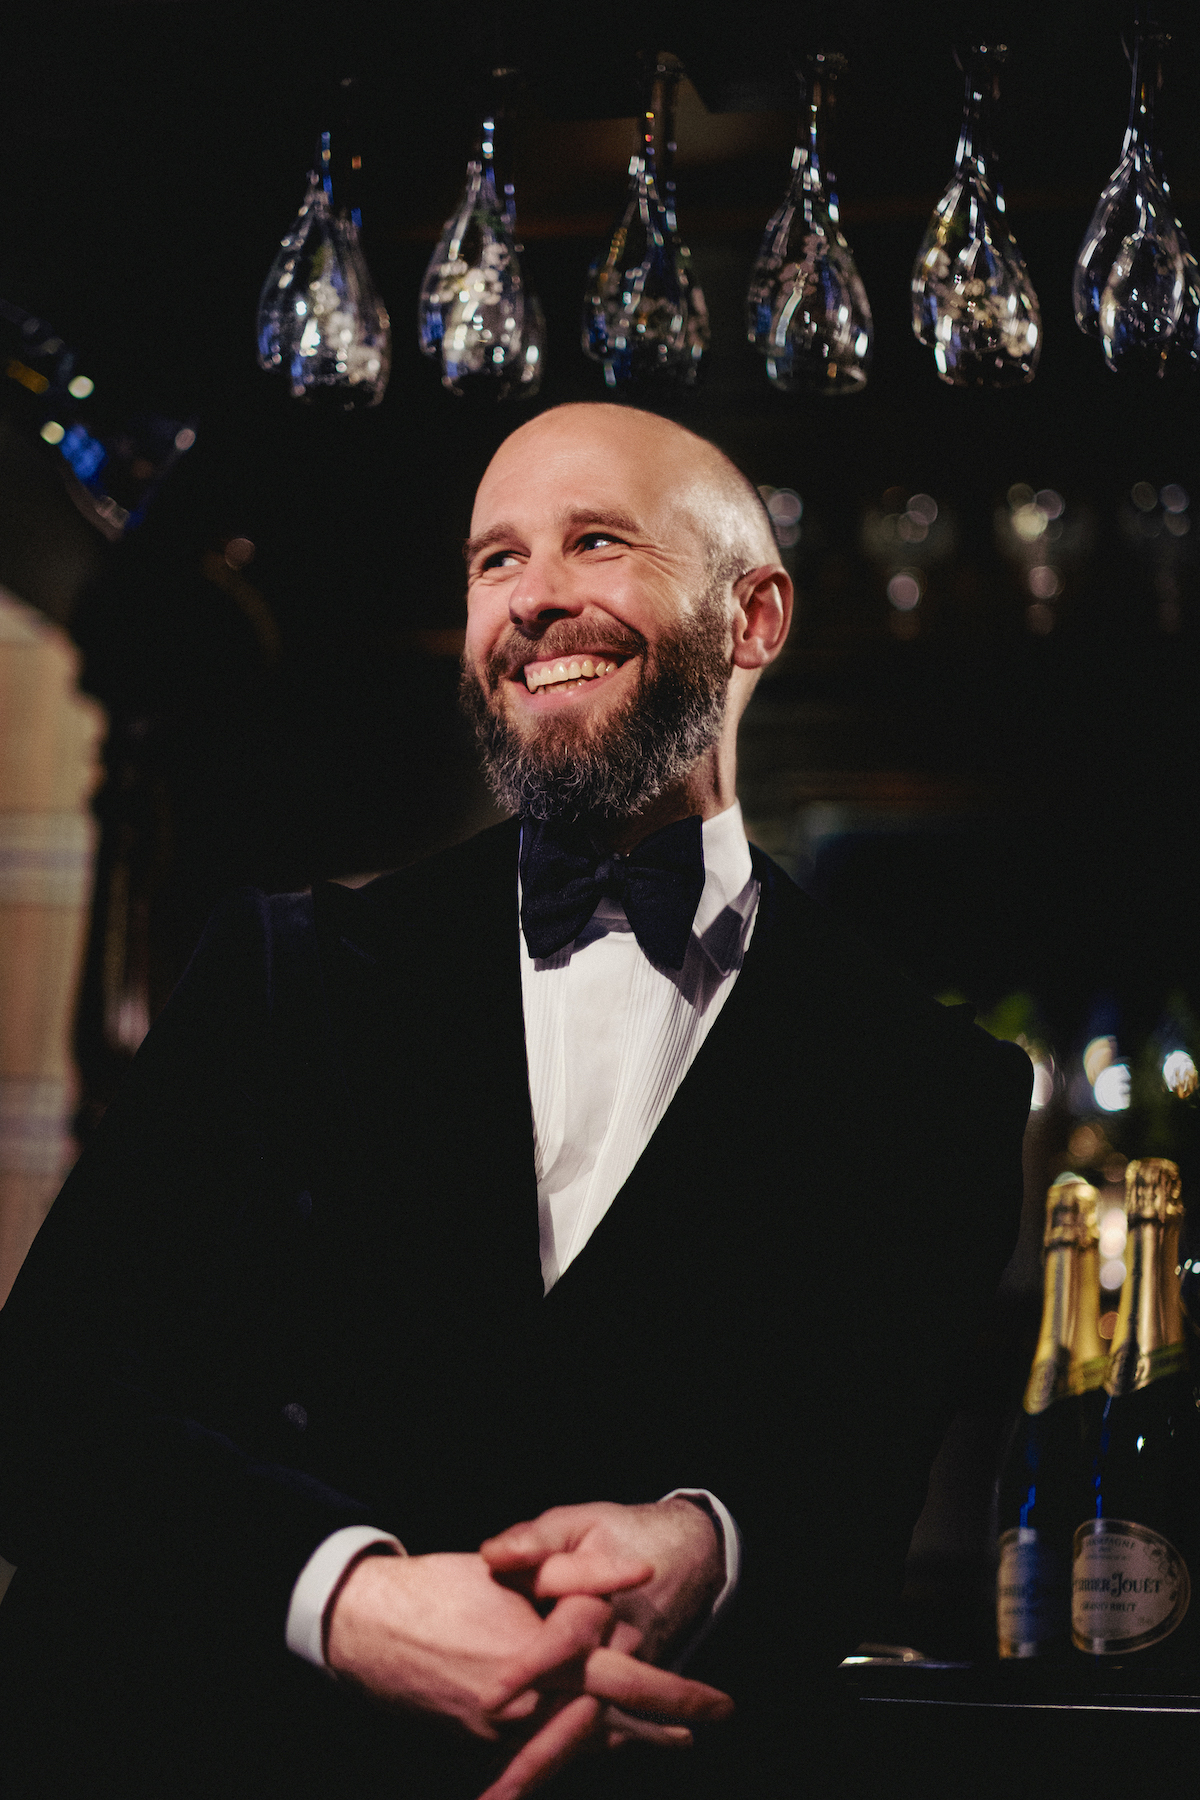
I did want a bow that was quite tall, both because I thought it would go well with my relatively long face, and (more importantly) because it would sit better with the velvet jacket I usually wear.
That jacket, shown in this article, is from Cifonelli, their 6x2 double breasted. Its low buttoning point means there is a big opening in the chest for the bow to sit in. A small style could easily look out of proportion.
The jacket also has very wide lapels. That’s partly driven by the low buttoning, but is also a characteristic of Cifonelli generally. My pale-grey DB from them for example, shown here, is a 6x4 but still has wide lapels (4.5 inches at the point, compared to 4.75 on my velvet).
So, a big bow was needed. That ruled out a batwing, as that’s best as a narrower shape. And I’ve never been much of a fan of the diamond-end, as it can look a little gimmicky.
So a large butterfly. But how large? Although it had a good amount of space to fill, I wanted something that was in proportion to the rest, not a statement on its own (unlike Mickael’s bow for Marc Jacobs, for example).
The way you make a bow tie like this - large but too dramatic - is to give it a ‘dropped’ shape.
This is the kind of thing you never realise until someone points it out, but after that can’t stop seeing.
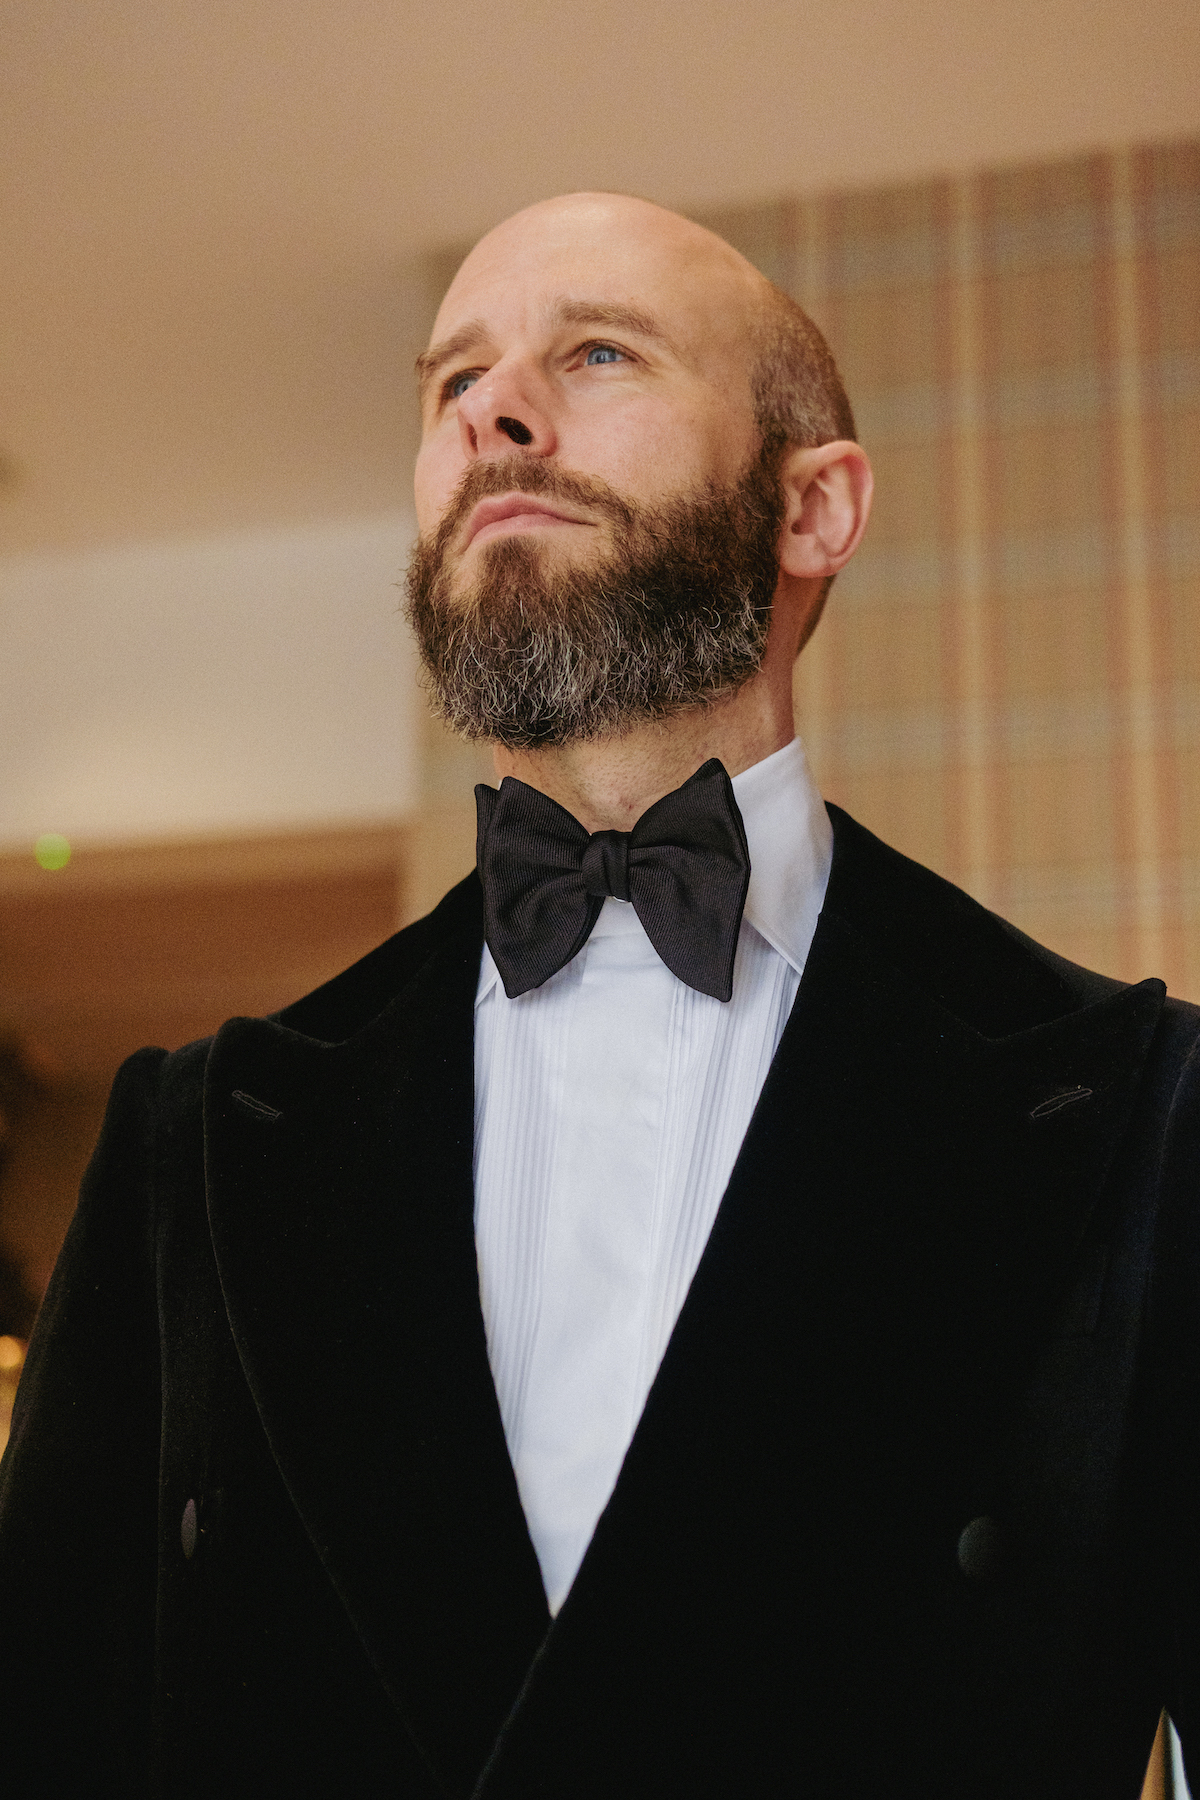
The top and the bottom half of my bow tie are not the same size. As you can see in the image below, the bottom half is actually larger, bulging out rather a lot.
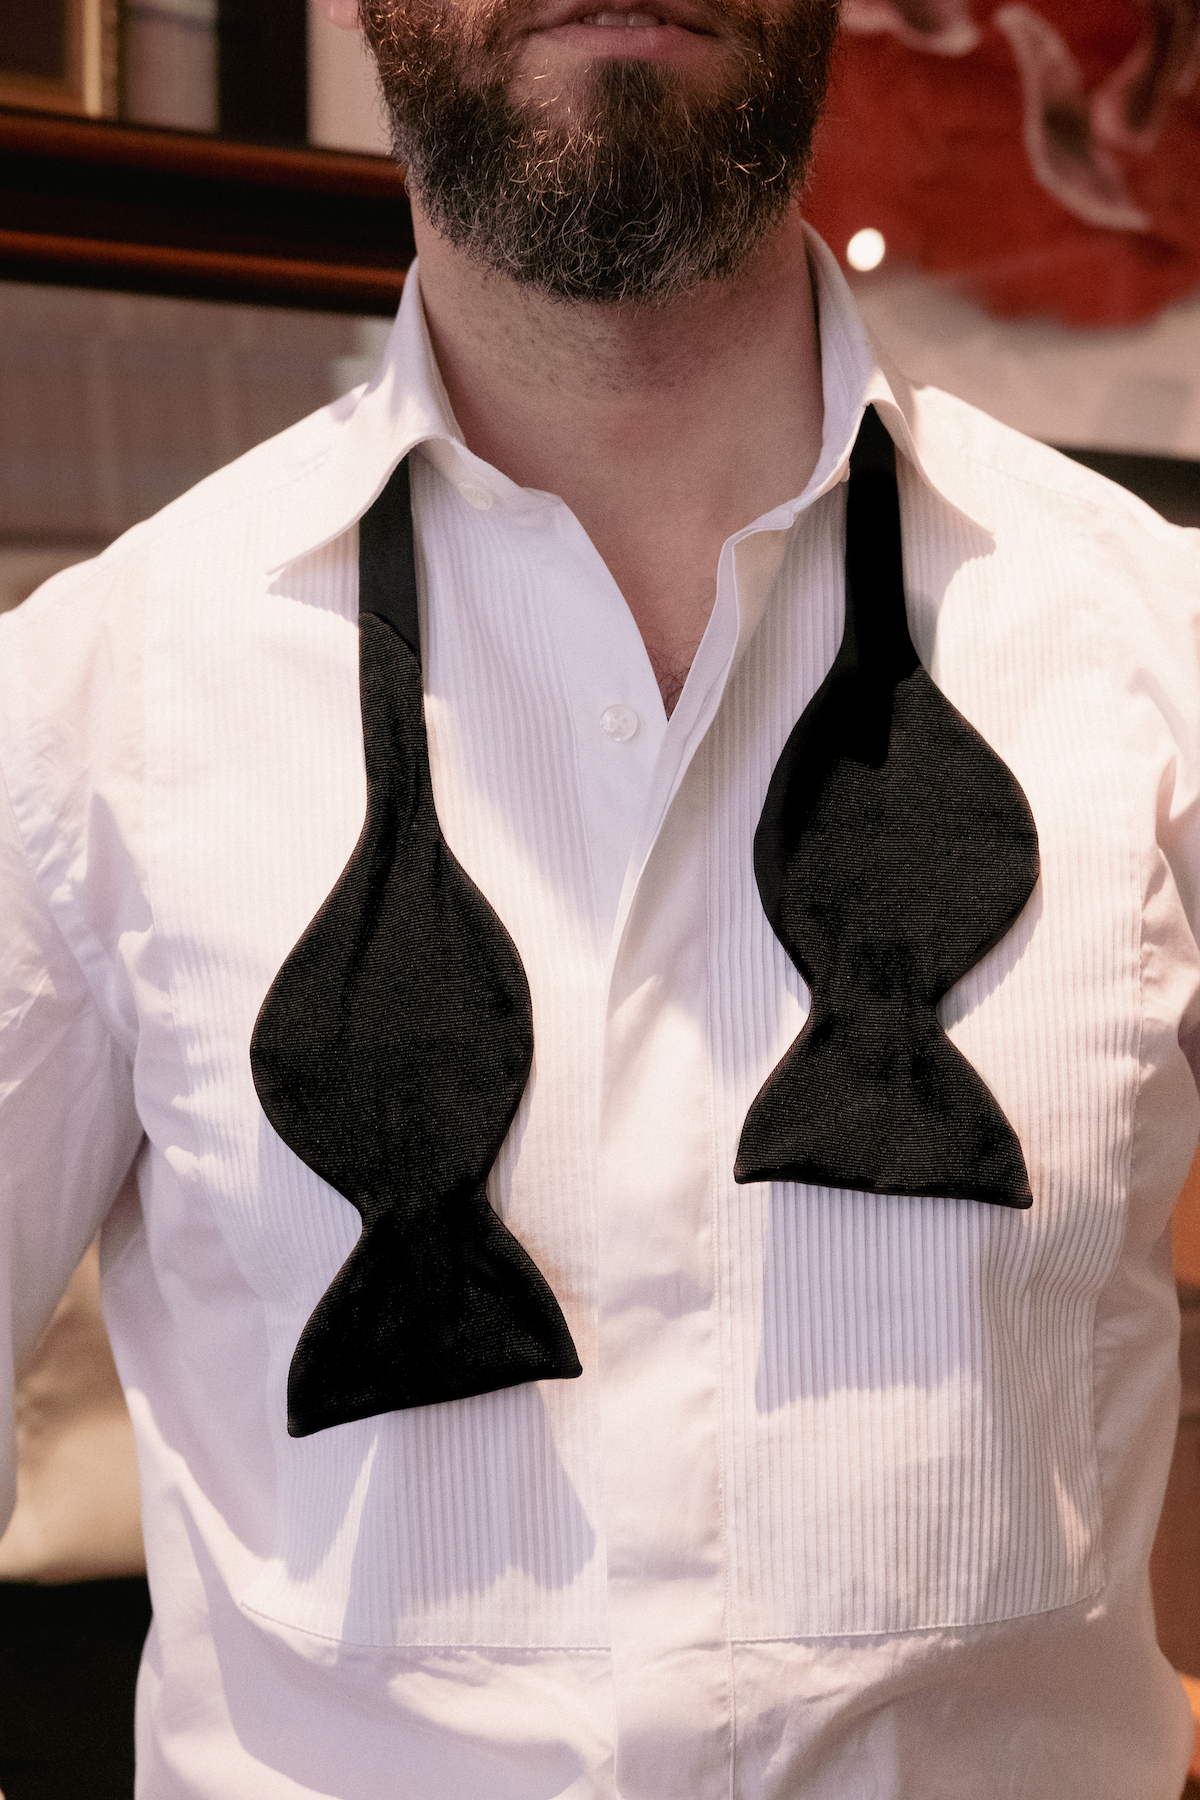
You don’t notice when the bow tie is tied, however. I doubt anyone looking at the images in this article thought, ‘that bow is bulging at the bottom’
Yet it does make a difference to how big you can make the bow without it looking over the top, or being so tall it starts to poke you in the chin. (You can also pull the two sides down slightly after tying it, if you want, to exaggerate the effect.)
Mickael’s standard dropped butterfly is 4cm on the top half, and 5.5cm on the bottom. It’s what you can see on Buzz on the La Bowtique site here.
I tried that on, but it felt a little bit too much for me. As if it was trying to make a bit of a statement, rather than fitting in with everything else.
So Mickael suggested making both top and bottom a half centimetre shorter: 3.5cm on the top, 5cm on the bottom. That’s the benefit of have something made bespoke, and it’s what you can see in these images.
Interestingly, that means my style of bow is more ‘dropped’, proportionately, than anything else Mickael does. But again I don’t think it’s noticeable unless you point it out.

For the material I went with a very classic grosgrain silk, with a lightweight lining. The usual rule is to match the lapels of the jacket (the facings), and mine are unusual in being velvet rather than silk.
But I felt that a velvet bow might be too much, and I do have a tuxedo with grosgrain lapels that I’d like to wear it with as well.
The lining made quite a big difference compared to other bows I’ve had. It’s lighter, and makes the bow feel more malleable, with more volume.
That’s helped by the handmade construction too: most bow ties on the market have the lining fused to the front half of the bow, which means they have less body. With an unfused construction, the bow looks much more natural - for example if you pull the ends forward slightly, to give it a more three-dimensional shape.
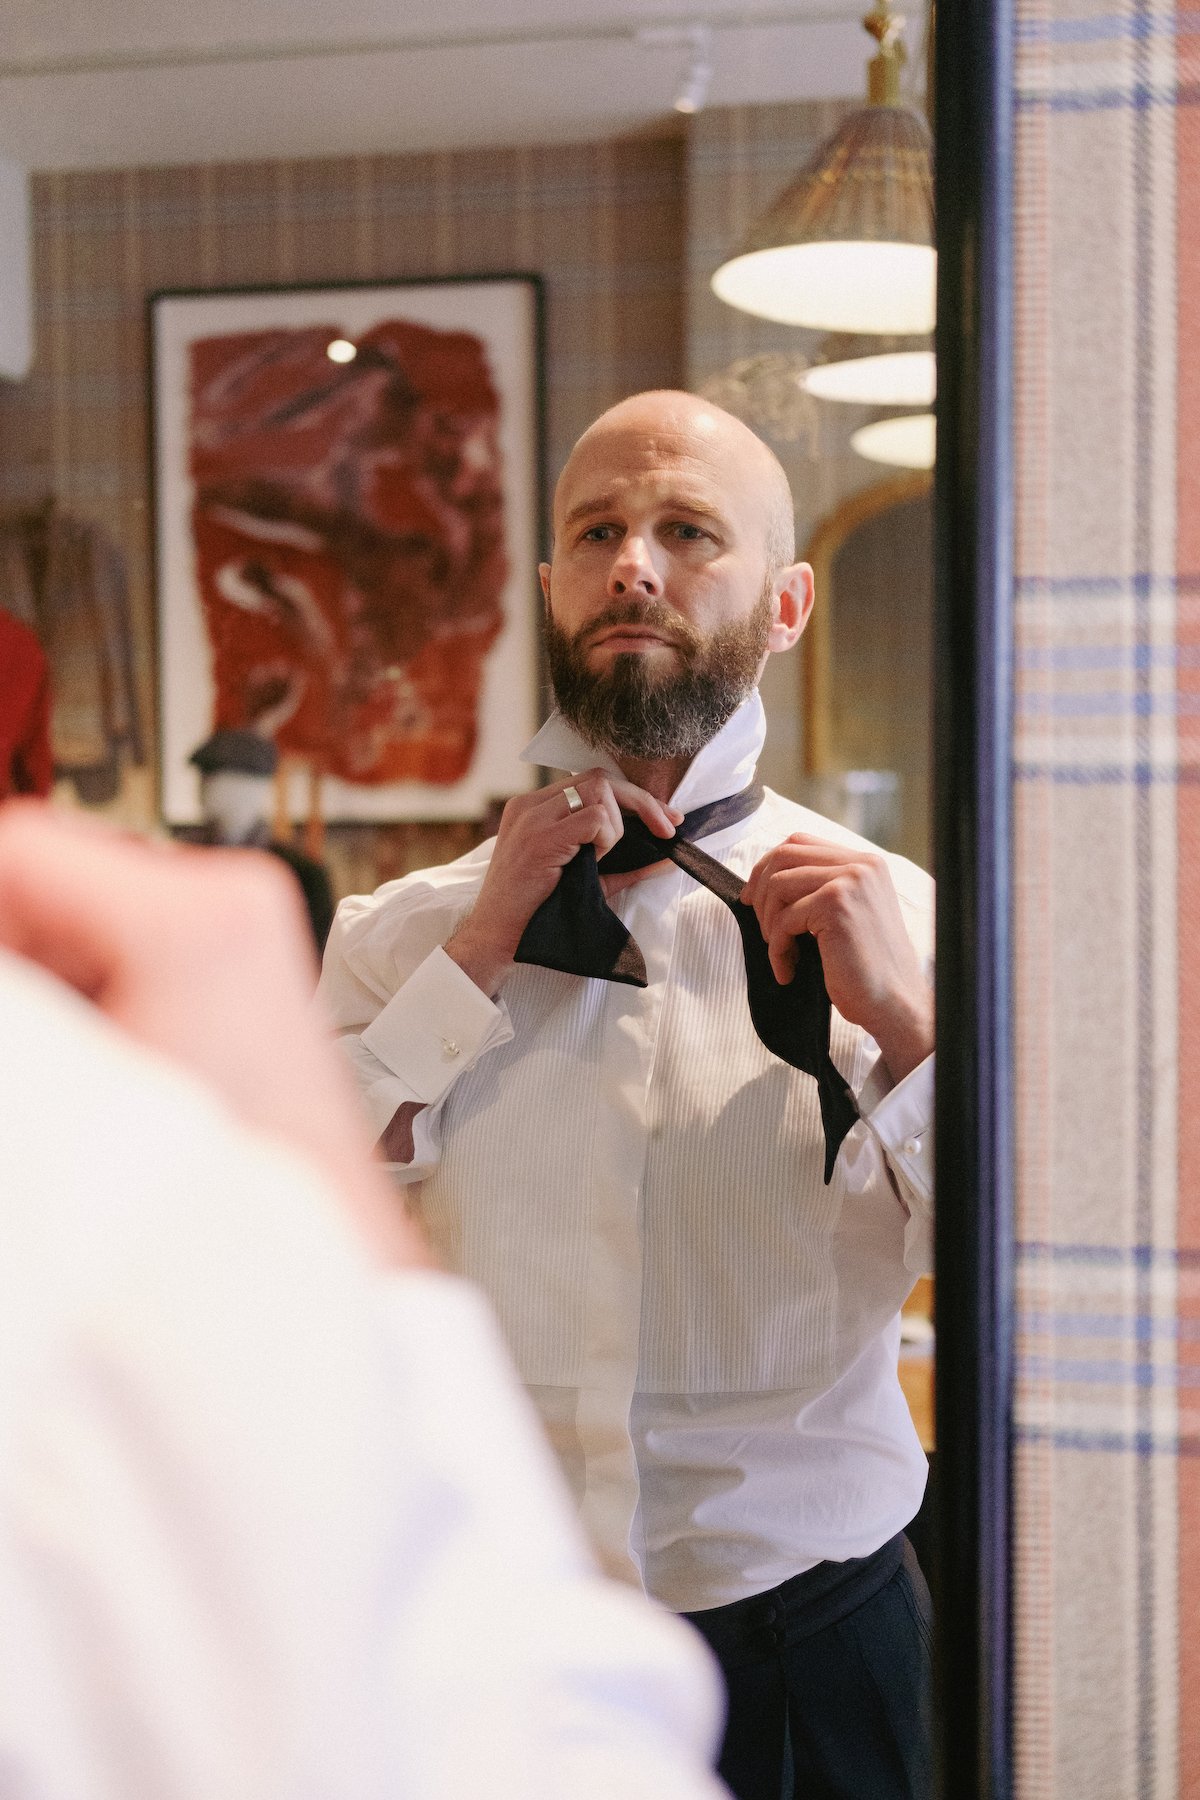
In terms of tying tips, this is something I’ve been good at in the past, and even enjoyed, but the memory fades fast.
During the process with Mickael I must have tied it 30 or 40 times, and it’s only after doing it that much again that I really felt I’d nailed it once more.
I won’t go into the tips we discussed, as they’re all in Mickaels’ video here. I’ll just say that the things that made the most difference for me were:
- Tying the first over-and-under knot tightly
- Doing that knot the right way round (the right end on top)
- Making sure the front part of the bow was big enough before tying the back, and
- Not worrying about the overall shape until the bow is tied. It’s all in the fiddling afterwards
If you’re doing everything right though, what you need is practice. So now I have to find an excuse to wear black tie again, and keep the practice up.
My bespoke bow tie cost £200 (the starting price for bespoke) and took 4 weeks to make (the minimum, standard is 4-6 weeks). The closest ready-made bow would be a large dropped grosgrain, which costs £150.
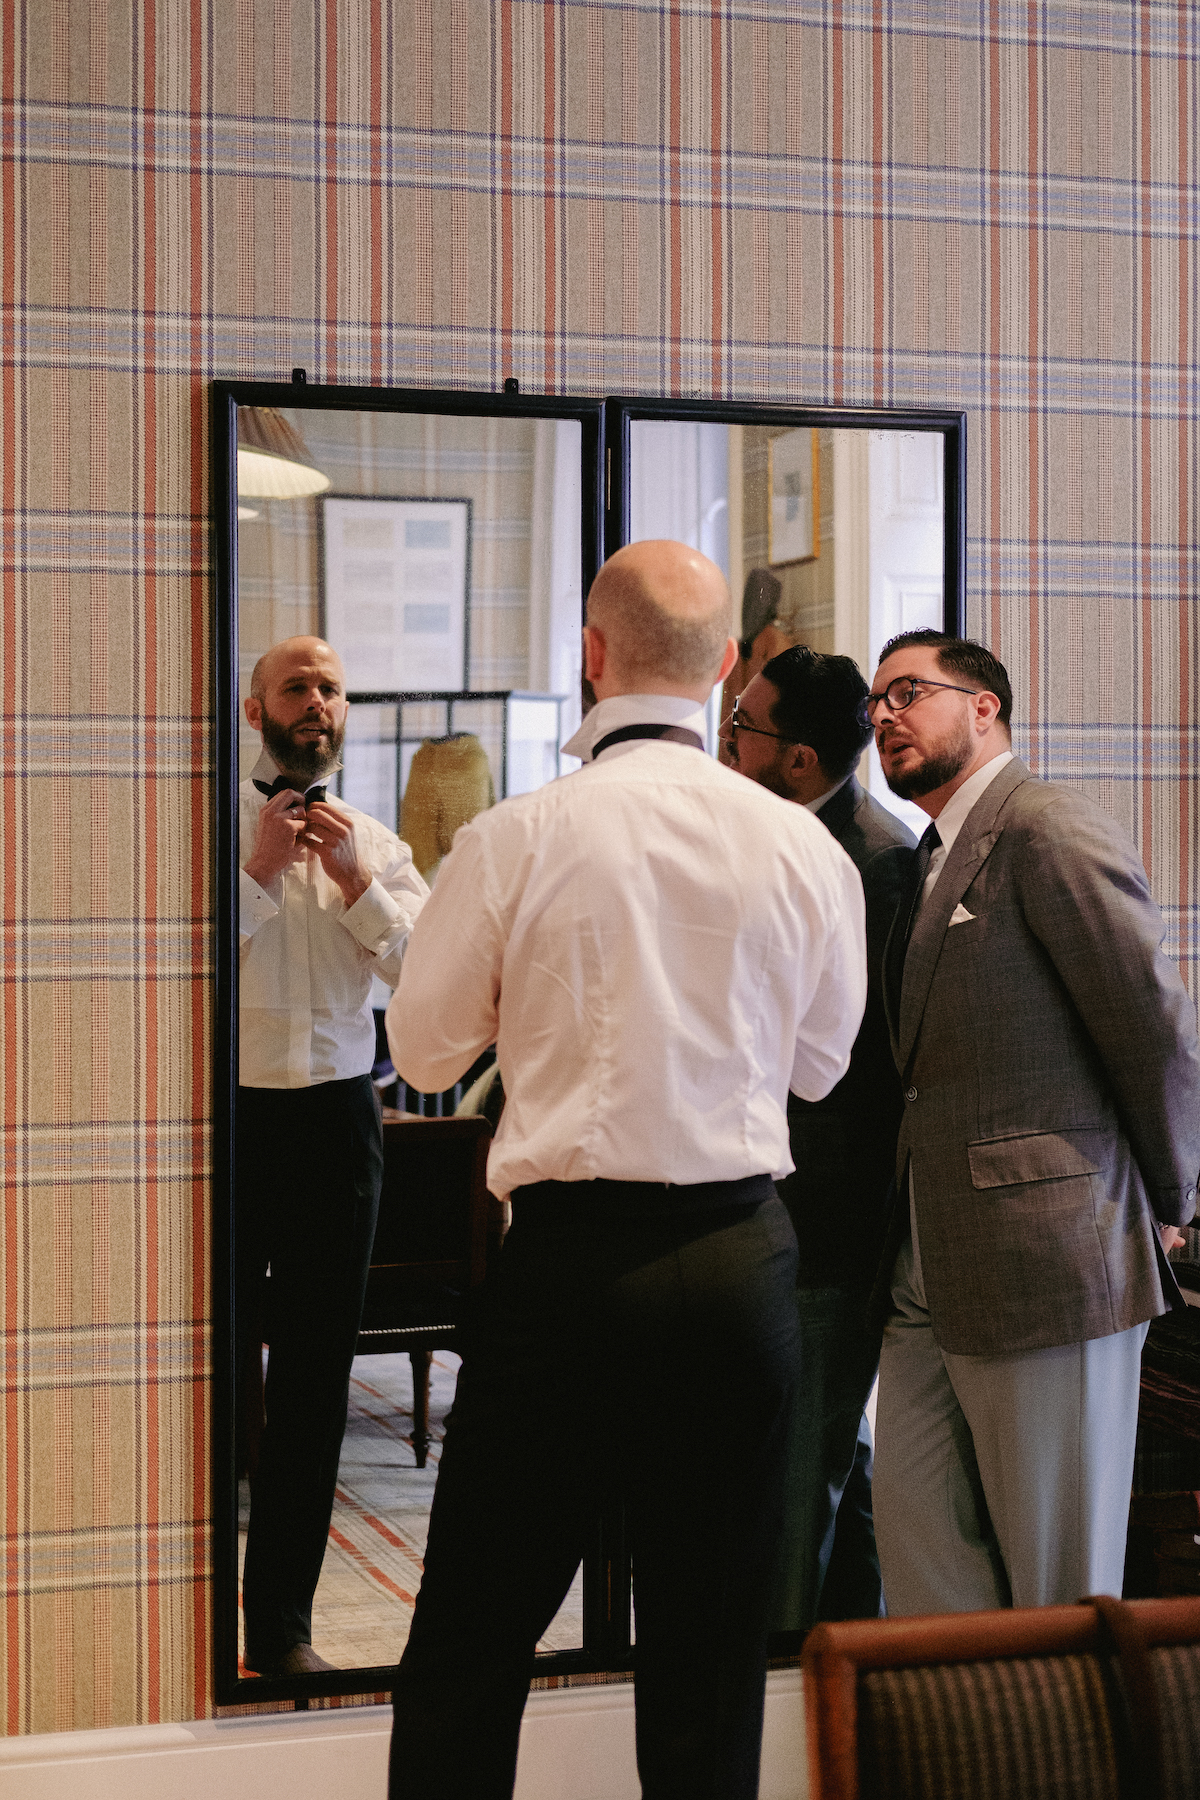
Many thanks to Huntsman for allowing us to shoot in their club room.
Photography: Mohan Singh
DMTBeautySpot
via https://dmtbeautyspot.com
Simon Crompton, DMT.NEWS, DMT BeautySpot,


0 comments